


Look up cataloging guides.
If you tend to import your MARC records when you have ordered the book (as opposed to when you receive the books), and allow patrons to place holds on those books, you may need to add item records to the *.mrc file before importing.
The easiest way to import your latest order is to first run your records through MARCEdit. Download your MARC records, saving them to your desktop or some other location you use/will remember. If you have MARCEdit already installed you should simply have to double click on your MARC records, and they will automatically open in MARCEdit.
-
Your original file will automatically be in the input; ensure MarcBreaker is chosen, and then click "Execute"

-
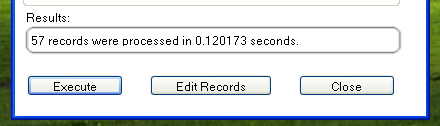
You will be presented with a summary of the records processed at the bottom of the screen
-
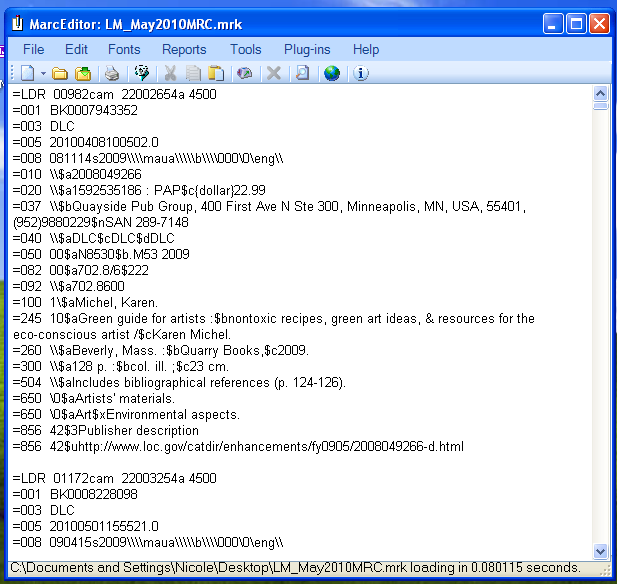
Click 'Edit Records' to continue on to adding item records
-
Your screen will be replaced with a larger screen containing the MARC records
-
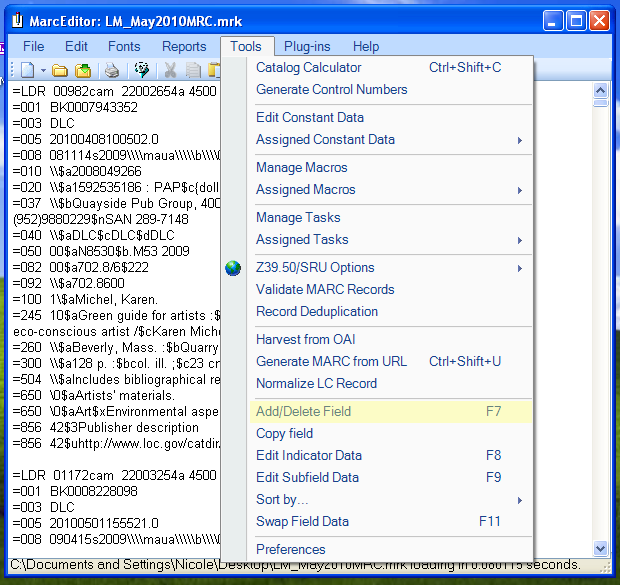
Click on Tools > Add/Edit Field
-
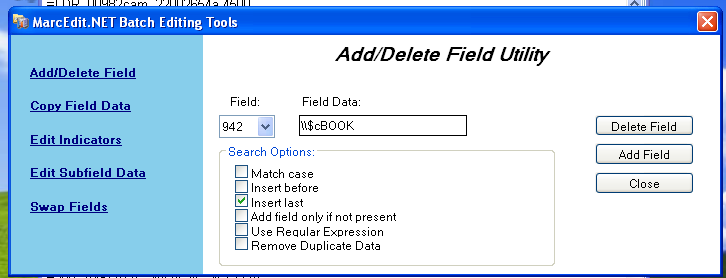
Enter in the Koha specific item info
-
In the Field box, type 942
-
In the Field Data box, type \\$c and the item type code (\\$cBOOK in this example)
-
Check the 'Insert last' option
-
Click 'Add Field'
-
-
Enter in the item record data
-
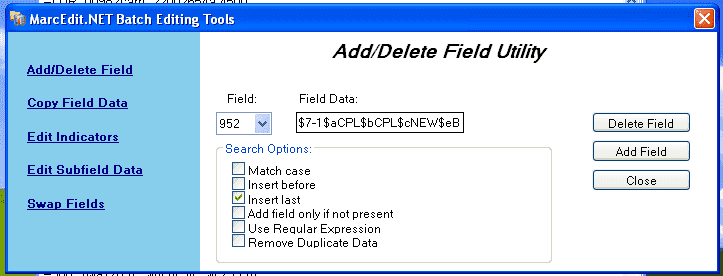
In the Field box, type 952
-
In the Field Data box, type $7ORDERED_STATUS$aPERM_LOC$bCURR_LOC$cSHELVING_LOCATION$eSOURCE_OF_ACQ$yITEM_TYPE
-
ex. $7-1$aCPL$bCPL$cNEW$eBrodart$yBOOK
-
In a default install of Koha -1 is the value for the Ordered status
-
-
You may want to look at other subfields you would like data in -- for example, changing the collection code to put all the items in the same collection (8), automatically fill in the acquisition date (d), or put in a public note (z).
-
Be sure you use the $ to separate subfields; adding each subfield on a separate line will cause that many items to be imported with your MARC record (in the example above, four items, each with one of those subfields corrected)
-
Make sure you look at the Administration > Authorized Values in Koha to put the correct code into the field
-
-
Check the 'Insert last' option
-
Click 'Add Field'
-
-
Close the field editor window
-
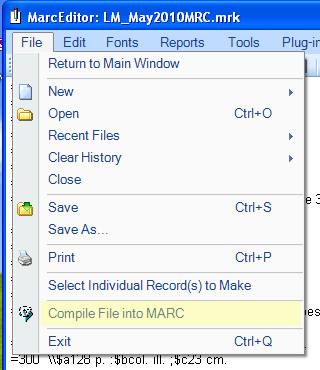
Click on File > Compile into MARC
-
Choose where to save your file
Now you want to go into your Koha system and follow the instructions for importing MARC records.
Once the item has come in, you will need to go to the item record and individually change the item to have the correct barcode, and manually change the status from Ordered to the blank line in the Not for Loan field.